DimYourMini
Takes brief webcam samples, reads changes in image brightness and decides how your enabled screens should respond.
 DimYourMini
Two apps. One comfortable desk.
Here’s what each one does, and how to get started.
Takes brief webcam samples, reads changes in image brightness and decides how your enabled screens should respond.
Provides the display controls this beta uses to read and change monitor brightness. It is a separate app and needs to stay running.
Yes, BetterDisplay is required for this beta. It isn’t bundled with DimYourMini. Its own feature availability, compatibility and license terms apply. You don’t need a separate command-line download or a Terminal command for this setup.
Before you begin: an Apple silicon Mac mini with macOS 14+, an external monitor controllable through BetterDisplay, and a webcam recognized by macOS. The Anker C300 shown below is our tested camera, not a required brand. Other cameras and displays still need testing.
Download BetterDisplay from its official website ↗, move it to your Applications folder, then open it. This beta expects /Applications/BetterDisplay.app.
Open BetterDisplay’s menu and check that your external monitors appear. Try its brightness slider for each monitor first. If a monitor doesn’t respond here, resolve that in BetterDisplay before starting DimYourMini.
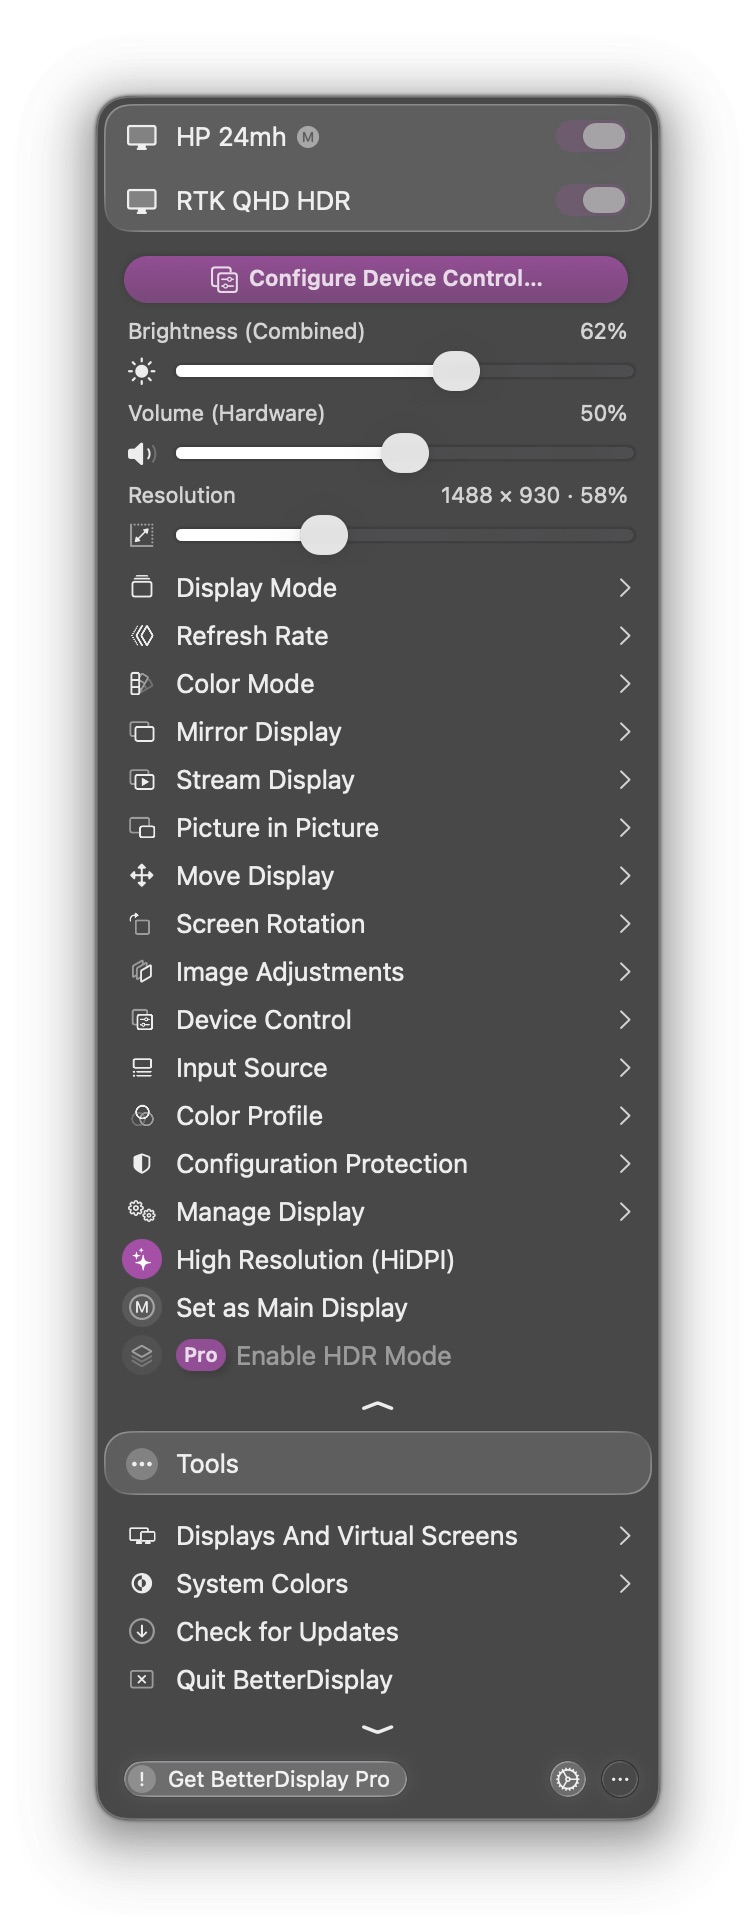
Ready when: each monitor you want to automate responds to BetterDisplay.
In BetterDisplay, open Settings → Application, then scroll to Integration. Confirm that Enable CLI access and notification based integration is on.
This lets DimYourMini send local brightness requests to BetterDisplay. Keep BetterDisplay running while you use automatic brightness. The custom URL scheme and HTTP server aren’t needed for this connection.
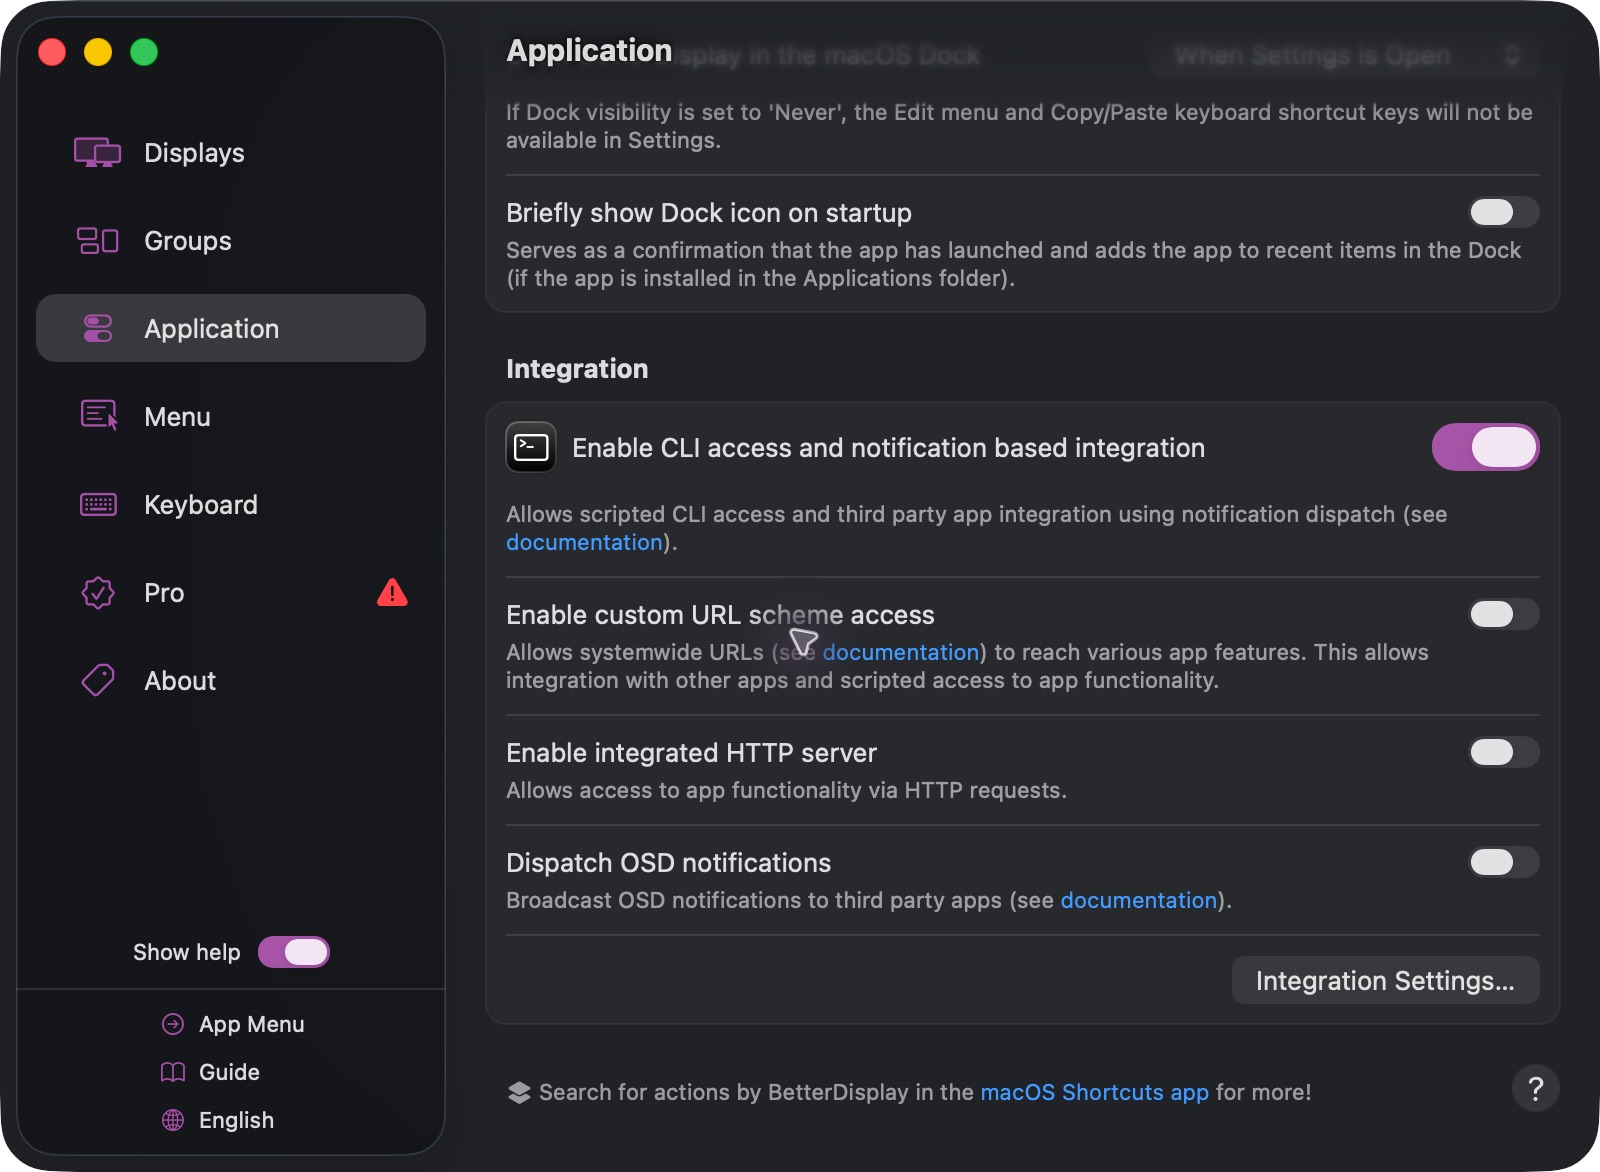
Ready when: CLI access is on and BetterDisplay is still running.
Download the DimYourMini beta, open the ZIP and move DimYourMini.app to Applications. Open it and connect your webcam and monitors.
The current download is ad-hoc signed and not notarized; macOS may block it. Only continue if you trust this beta and its source. If that happens, read Apple’s guidance on opening apps safely ↗ before deciding whether to proceed.
In Overview, choose your webcam under Your webcam. External monitors are detected automatically and enabled by default. Leave a monitor on to automate it; turn it off for manual control. At least one must be enabled to start.
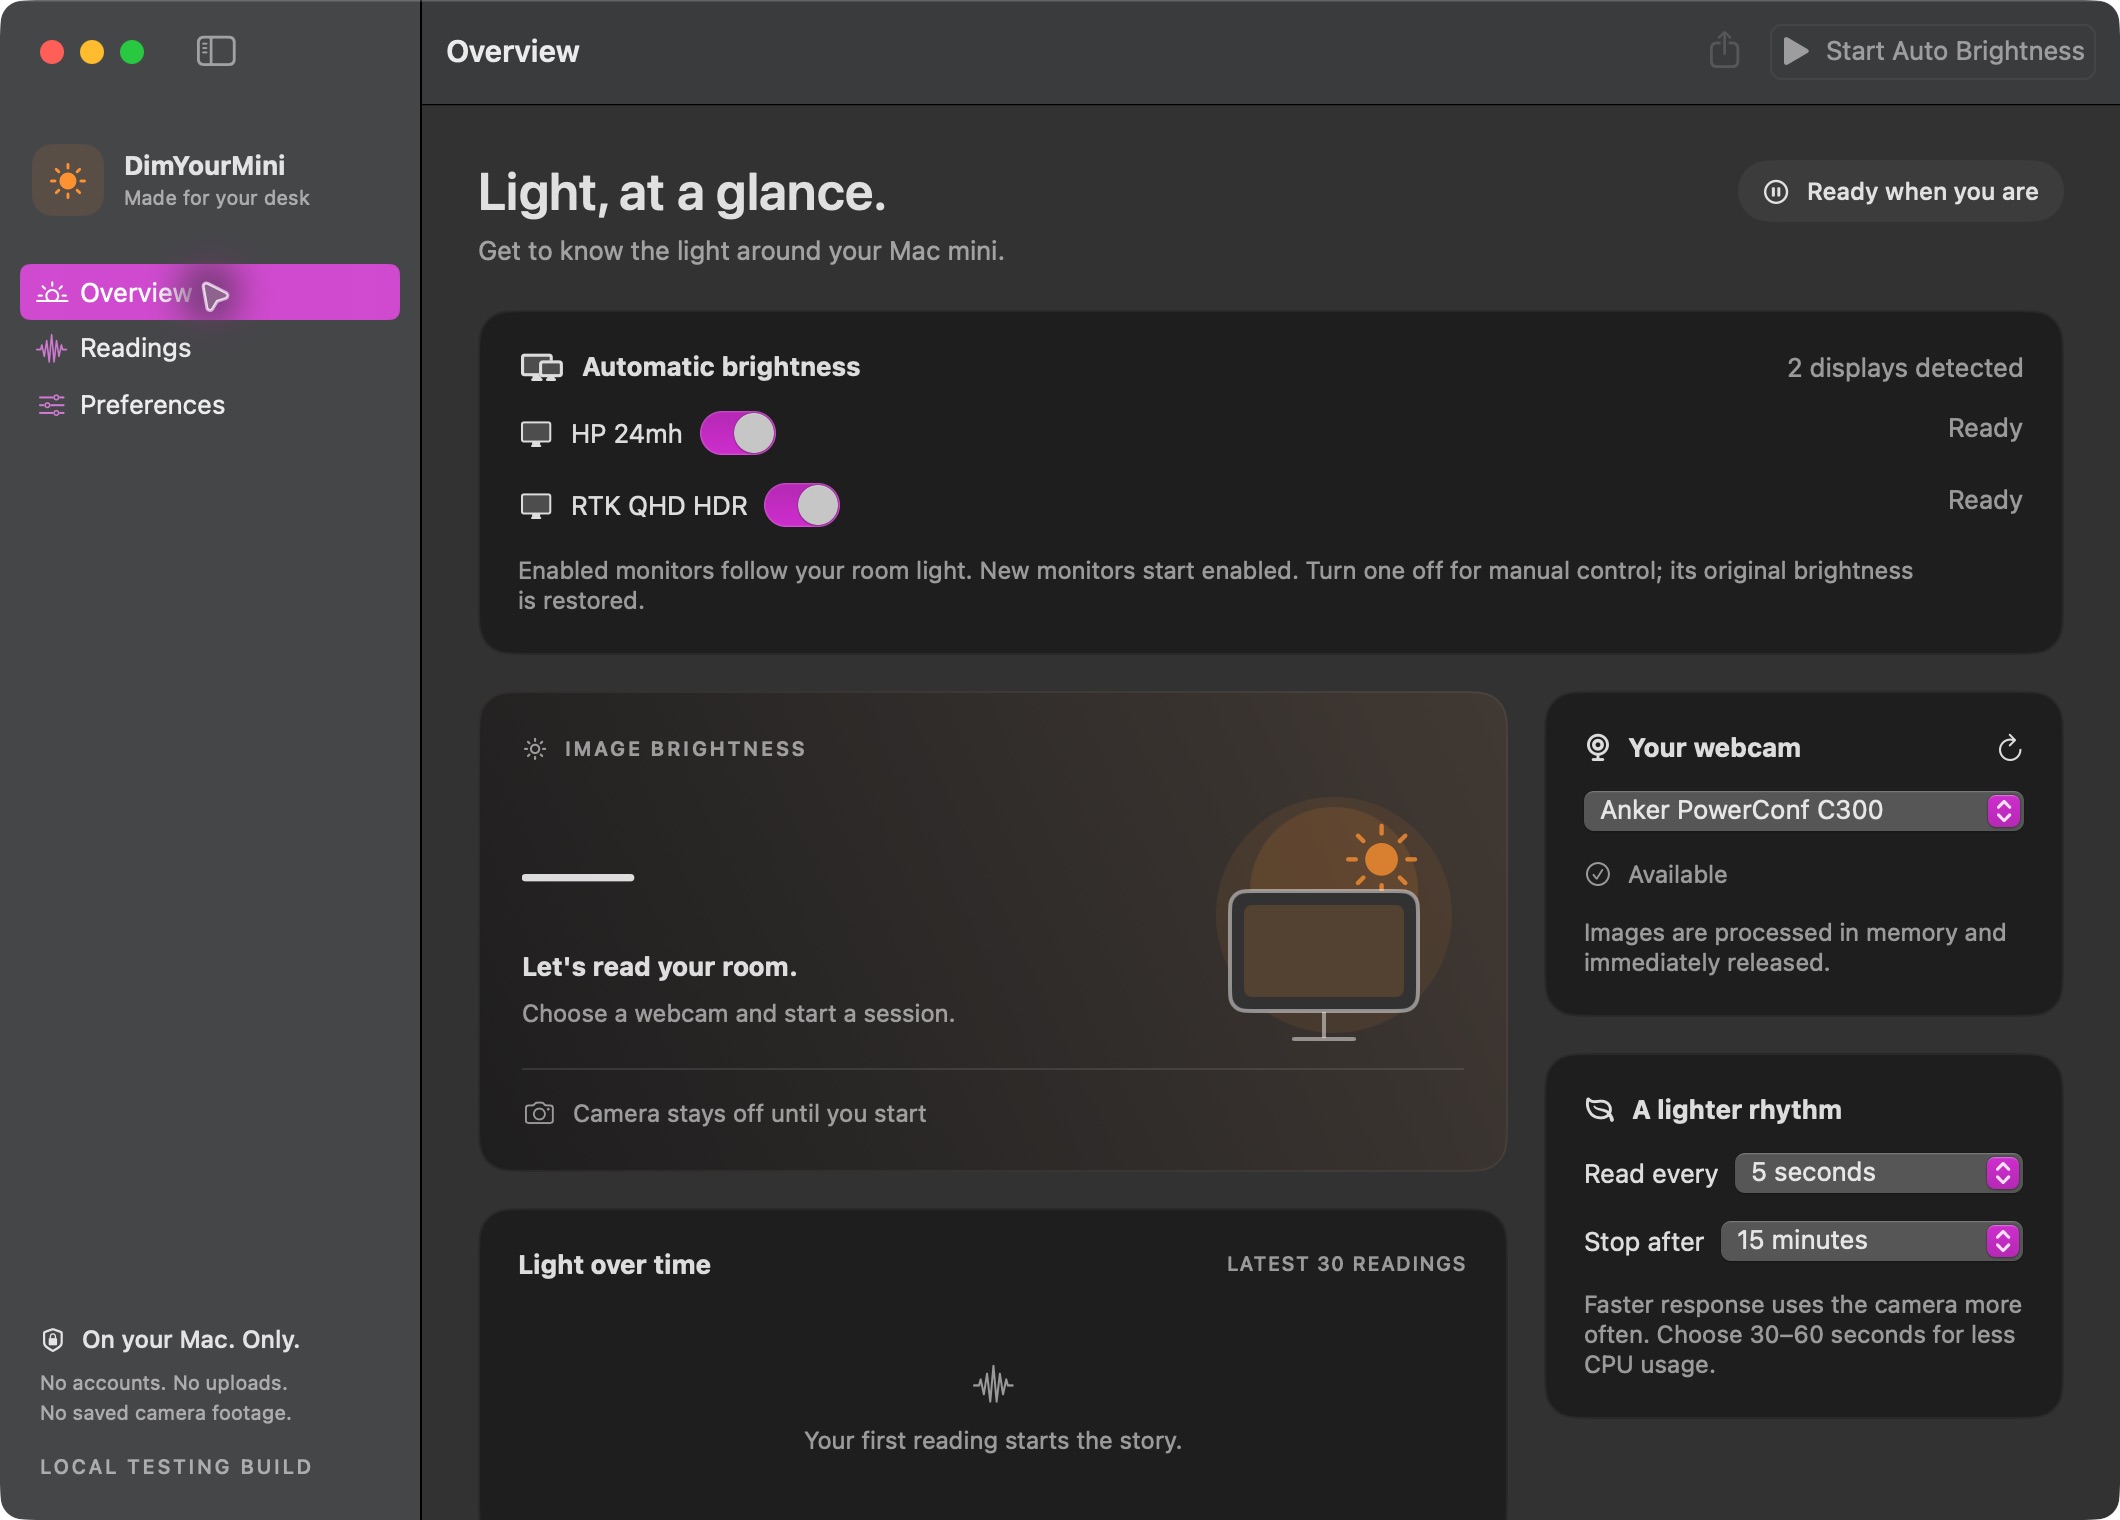
Ready when: your webcam is available and the monitors you want to control are enabled.
Set each enabled monitor to a comfortable brightness in your normal room lighting. Keep the webcam uncovered and in its usual position. In Overview, leave Read every at 5 seconds for your first test, then click Start Auto Brightness in the top-right toolbar.
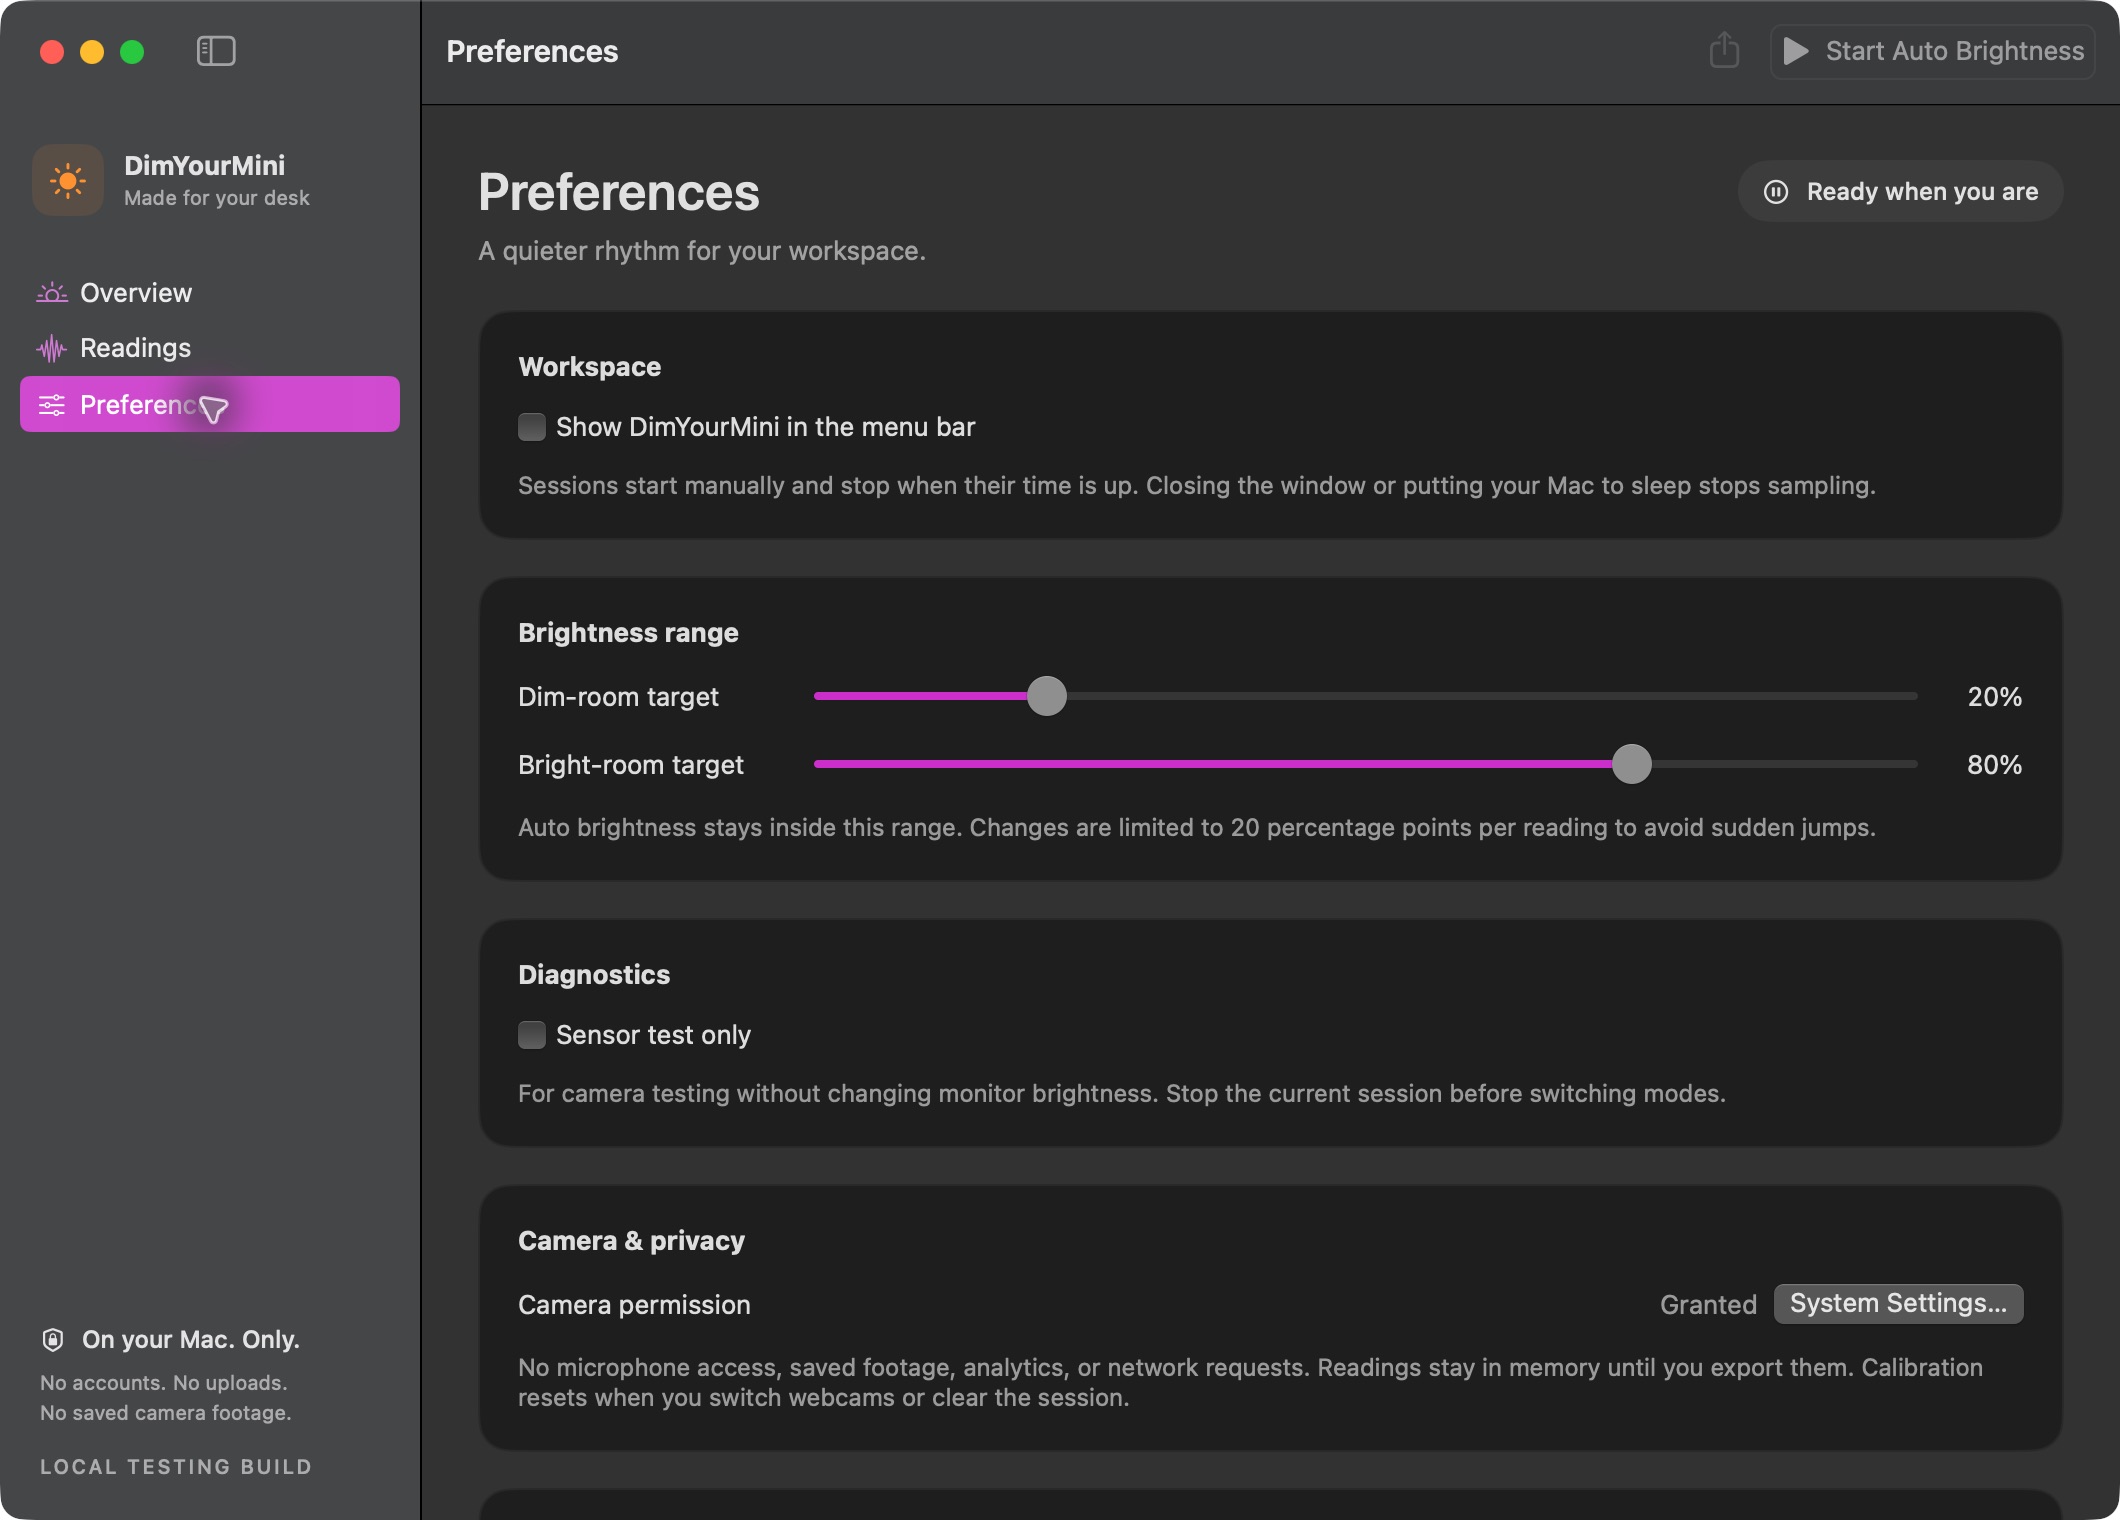
Choose Allow if macOS requests camera access. To review permission, open DimYourMini’s Preferences → Camera & privacy. If access was denied, its System Settings… button takes you to macOS settings; allow DimYourMini under Privacy & Security → Camera, then try again. Apple’s camera permission guide ↗
Return to Overview. Once the first reading appears, change your room light and allow a few readings for the response to settle. The first reading and each monitor’s starting brightness form the initial reference. Sampling and smoothing mean changes aren’t instant.
Use Preferences → Brightness range to set your dim- and bright-room targets. Optional Mark dim room and Mark bright room in Overview let you calibrate two real lighting conditions. Keep the camera position the same for both.
Switching a display off attempts to restore its starting brightness and leaves it under manual control. Stop attempts to restore all controlled displays. Sessions stop after the selected duration—15 minutes by default. A crash, force quit, disconnect or stopped BetterDisplay can prevent restoration.
Ready when: readings arrive and your enabled displays follow a change in room light.
Confirm BetterDisplay is in Applications and running, CLI access is on, and its own brightness slider works for that monitor. Check the monitor’s switch in Overview. In Preferences, Sensor test only must be unchecked. Stop the session before changing that mode, then start again.
Check its cable, power and macOS connection, then confirm BetterDisplay sees it. Stop and reopen DimYourMini if needed. Display and adapter compatibility vary; physical hot-plug behavior is still being tested.
Use 5-second sampling for the fastest available setting. Longer intervals intentionally delay readings. Keep the webcam in a stable position; auto-exposure, screen light and objects in the frame affect image brightness. Try the optional dim/bright calibration. The reading is relative camera luminance, not a lux measurement.
Check the selected camera and camera permission. Close other camera apps, refresh the camera list and try again. Stop DimYourMini during video calls; coexistence with meeting apps hasn’t been fully validated. Other webcam models still need testing.
The camera opens briefly for each reading, so its indicator lights during capture. Frames are processed in memory and released, without saved photos, video or microphone access. Choose 30–60 seconds for fewer captures, or Stop to end the session.